Как правильно считывать показания индикаторных полосок для химической стерилизации паром
Дата выпуска: 10.08.2026
Оглавление
Надлежащая стерилизация медицинских инструментов является краеугольным камнем инфекционного контроля в любом медицинском, стоматологическом или лабораторном учреждении. Хотя современные автоклавы представляют собой высокотехнологичное оборудование, простого запуска цикла и отображения надписи «завершено» на цифровом дисплее недостаточно для гарантии стерильности. Физические параметры — время, температура и давление — должны воздействовать на самые внутренние части каждого набора инструментов. Именно здесь становится крайне важным химический контроль.
Понимание того, как читать химический индикатор паровой стерилизации Это важнейший навык для техников по стерилизации, ассистентов стоматологов и лабораторного персонала. Неправильная интерпретация этих маленьких, но жизненно важных полосок может привести к катастрофическим последствиям: выпуску нестерильных инструментов для использования пациентами, риску внутрибольничных инфекций и нарушению соответствия требованиям медицинского учреждения.
В этом подробном руководстве мы рассмотрим научные основы работы этих индикаторов, как правильно интерпретировать изменения их цвета, лучшие практики их размещения и что делать в случае неудачной стерилизации.
Роль химических индикаторов в мониторинге стерилизации
Мониторинг стерилизации основывается на трех различных принципах: механическом, химическом и биологическом.
- Механический мониторинг: Это включает в себя проверку показаний манометров или цифровых распечаток стерилизатора для подтверждения того, что аппарат достиг правильной температуры, давления и времени воздействия. Однако это показывает только то, что произошло в месте расположения датчика, а не внутри пакетов.
- Биологический мониторинг (тестирование спор): Биологические индикаторы, считающиеся золотым стандартом, используют высокоустойчивые бактериальные споры (например, Geobacillus stearothermophilus) для подтверждения летальности. Если споры погибают, то бактериальная нагрузка считается стерильной.
- Химический мониторинг: В этом методе используются химические красители, реагирующие на определенные параметры стерилизации. индикаторная полоска для автоклавирования Обеспечивает немедленное визуальное подтверждение того, что стерилизующее средство (пар) проникло в упаковку и достигло инструментов при необходимой температуре в течение требуемого времени.
Химические индикаторы не доказывают, что микроорганизмы мертвы; они доказывают, что... необходимые условия За убийство их встречали именно в том месте, где был установлен индикатор.
Понимание классификации индикаторов (типы 1-6)
Не все химические индикаторы одинаковы. Международная организация по стандартизации (ISO 11140-1) классифицирует их на шесть типов в зависимости от их характеристик и предполагаемого применения.
- Тип 1 (Технологические показатели): Это внешние индикаторы, как, например, лента для автоклавирования. Они просто различают обработанные и необработанные продукты. Они показывают, что упаковка была помещена в автоклав, но ничего не говорят о качестве цикла.
- Тип 2 (Индикаторы конкретного применения): Они используются для проведения специальных тестов, в первую очередь теста Боуи-Дика, который проверяет эффективность удаления воздуха в паровых стерилизаторах с предварительным вакуумированием.
- Тип 3 (однопеременные индикаторы): Эти устройства реагируют только на один критически важный параметр, обычно на температуру. В современной паровой стерилизации они используются крайне редко.
- Тип 4 (многопеременные индикаторы): Стандарт медицинская химическая индикаторная полоска Часто попадает в эту категорию. Она реагирует на два или более критических параметра (например, время и температуру).
- Тип 5 (Интеграция показателей): Это высокоточные индикаторы, реагирующие на все три критически важных параметра паровой стерилизации (время, температура и качество пара). Их эффективность коррелирует с кривой биологической гибели микроорганизмов, полученной в ходе спорового теста.
- Тип 6 (Имитация индикаторов): Это индикаторы, специфичные для каждого цикла, и они реагируют на все критические переменные в рамках конкретного, заранее определенного цикла стерилизации (например, ровно 3,5 минуты при 134°C).
Для внутреннего контроля упаковки Рекомендуются индикаторы типа 4, типа 5 или типа 6. для обеспечения достаточного проникновения пара.
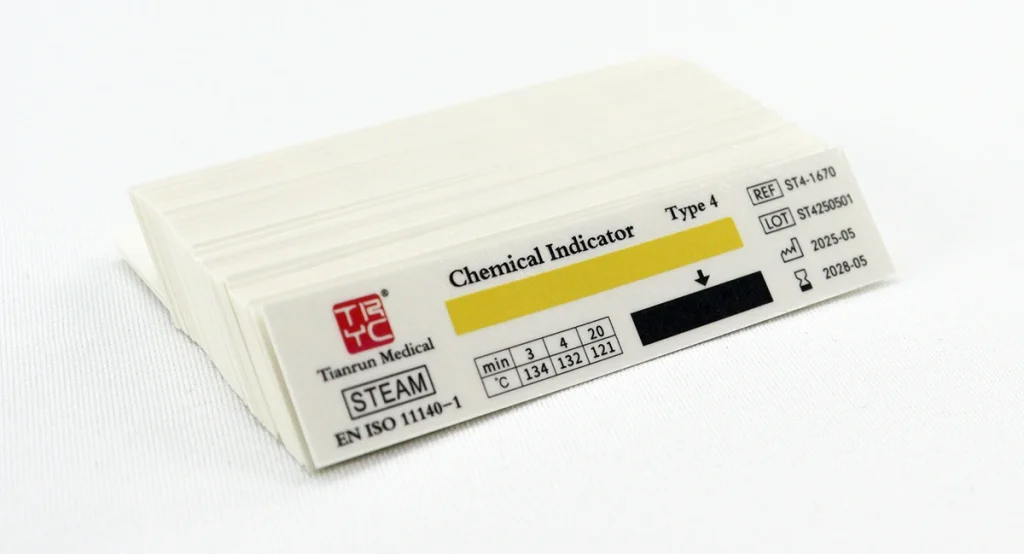
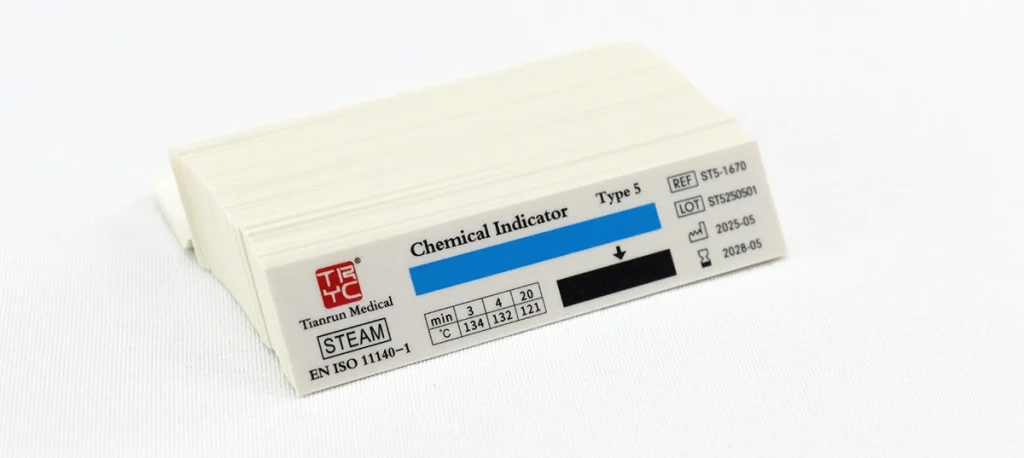
Пошаговая инструкция: Как читать индикаторную полоску для химических реагентов при паровой стерилизации
Основной механизм действия внутреннего химического индикатора — это химический краситель, который меняет цвет при воздействии правильного сочетания тепла, времени и насыщенного пара. Для точного считывания показаний требуется внимательность к деталям.
Шаг 1: Предварительная проверка перед циклом
Перед тем как поместить полоску в упаковку, ознакомьтесь с её исходным цветом и указанным производителем цветом, соответствующим допустимым значениям. Эта информация обычно напечатана непосредственно на полоске или коробке. Например, полоска может быть изначально бледно-белой или жёлтой, а после обработки стать тёмно-коричневой или чёрной. Проверьте срок годности; просроченные полоски могут давать неточные результаты.
Шаг 2: Правильное размещение («Наихудший сценарий»)
Индикатор необходимо разместить в той части упаковки, куда пару сложнее всего добраться. Обычно это геометрический центр упакованного пакета, жесткого контейнера или середина плотного хирургического лотка. Если вы используете стерилизационный пакет для стоматологических инструментовИндикатор следует размещать внутри вместе с приборами, а не полагаться только на внешнюю маркировку чехла.
Шаг 3: Интерпретация результатов после завершения цикла
После завершения цикла и охлаждения упаковок извлеките индикаторную полоску при вскрытии упаковки для использования (или во время проверок качества). Вам необходимо добиться полного и равномерного изменения цвета.
Вот как следует интерпретировать визуальные результаты:
| Визуальный результат на индикаторной полосе | Интерпретация | Необходимые действия |
|---|---|---|
| Полное изменение цвета (проход): Индикаторные чернила полностью приобрели заданный эталонный цвет (например, сплошной темно-коричневый/черный) по всей обозначенной области. | Условия стерилизации были соблюдены. в месте расположения полосы. | Использование инструментов пациентам разрешено при условии прохождения механического и биологического мониторинга (при необходимости). |
| Частичное/неполное изменение цвета (неудача): Цвет чернил изменился, но он светлее эталонного цвета, неравномерный, или изменился только часть полосы (например, стал бледно-коричневым или сохранил первоначальный цвет по краям). | Условия стерилизации НЕ были соблюдены. Пар не проникал достаточно глубоко, температура была слишком низкой или время воздействия было слишком коротким. | Отклоните груз. Обращайтесь с инструментами как с нестерильными. Проведите повторную обработку упаковки. Выясните причину проблемы. |
| Изменение цвета не произошло (провал): Полоса сохранила свой первоначальный цвет, существовавший до обработки. | Грубый провал. Вероятно, блок был полностью защищен от пара, или же цикл был преждевременно прерван. | Отклоните груз. Немедленно поместите предметы на карантин и проверьте работоспособность автоклава и порядок загрузки. |
| «Размытые» или растекшиеся чернила (неудача/аномалия): Чернила выглядят размытыми, бледными, сероватыми, а бумажно-пластиковая ламинированная поверхность может быть сморщенной или покрыто пузырьками. | Влажный пар или чрезмерная конденсация. Низкое качество пара препятствует полноценному завершению химической реакции. | Отклоните груз. Это указывает на серьезную проблему с подачей пара или функцией автоклавирования (влажные пакеты). |
| Чрезмерно тёмный или обугленный вид (аномалия): Полоска (или сама упаковка) выглядит обгоревшей, хрупкой или темнее, чем самая темная контрольная точка. | Перегретый пар. Пар не содержит влаги, действуя подобно сухому теплу, что делает его менее эффективным для стерилизации и может повредить инструменты. | Отклоните загрузку. Для устранения проблемы с качеством пара проведите техническое обслуживание автоклава. |
Углублённое чтение: Интеграторы с движущимся фронтом (тип 5)
Некоторые интеграторы типа 5 не полагаются на простое изменение цвета. Вместо этого они используют технологию «движущегося фронта». Темный химический шарик плавится и перемещается вдоль бумажной дорожки, видимой через окно. Чтобы считать показания, нужно посмотреть, как далеко прошла темная линия. Если линия пересекает четко обозначенную зону «ПРИНЯТО» или «БЕЗОПАСНО», цикл был успешным. Если она останавливается в зоне «ОТКЛОНЕНО» или «НЕБЕЗОПАСНО», цикл не удался. Это исключает субъективность оценки незначительных изменений цвета.
Устранение неполадок, приводящих к сбоям стерилизации.
Когда индикаторная полоска для автоклавирования Это свидетельствует о нарушении протокола инфекционного контроля и является критическим предупреждающим сигналом. Никогда не предполагайте, что индикатор неисправен; всегда предполагайте, что груз нестерилен.
В случае возникновения неисправности немедленно изолируйте поврежденные устройства. Вот наиболее распространенные причины, которые следует проверить:
1. Неправильные методы погрузки (наиболее распространенная причина)
Пар должен свободно циркулировать вокруг каждого пакета и проникать сквозь него.
- Перегрузка: Слишком большое количество пакетов, помещенных в камеру, препятствует попаданию пара в центр загрузки. Убедитесь, что пакеты расположены на соответствующем расстоянии друг от друга.
- Неправильное позиционирование: Твердые подносы следует размещать горизонтально, а пакеты для стерилизации медицинских инструментов Их следует размещать на ребре (используя подставку), при этом бумага должна быть обращена к пластику. Раковины следует наклонять, чтобы конденсат мог стекать.
- Плотная упаковка: Слишком тугая упаковка хирургического набора или размещение слишком большого количества тяжелых инструментов на одном подносе создает холодные зоны, через которые пар не может проникнуть.
2. Неправильный выбор цикла
Для разных грузов требуются разные циклы. Запуск цикла гравитационного вытеснения для плотного, упакованного груза, требующего предварительного вакуумирования (динамического удаления воздуха), приведет к следующему результату: неисправность внутреннего индикатора химического состава упаковки из-за захваченного воздуха.
3. Неисправность оборудования
Если загрузка выполнена правильно, возможно, неисправен сам станок.
- Утечки воздуха: В стерилизаторах с предварительным вакуумированием неисправный уплотнитель дверцы может привести к утечке воздуха, нарушая паровую среду.
- Низкое качество пара: Пар должен быть насыщенным (примерно 971 TP3T пара, 31 TP3T воды). «Влажный пар» приводит к вымыванию индикаторов и намоканию упаковок. «Перегретый пар» (сухой пар) препятствует химической реакции и не обеспечивает эффективной стерилизации.
- Засоры в канализации: Дренажная камера имеет решающее значение для удаления воздуха и конденсата. Если сетчатый фильтр засорен мусором, в нем задерживается воздух, образуя холодные зоны, где стерилизация не происходит.
Рекомендации по использованию химических индикаторов паровой стерилизации
Для обеспечения максимальной безопасности пациентов и соблюдения нормативных требований руководители медицинских учреждений и персонал, занимающийся стерилизацией, должны придерживаться следующих передовых методов:
- Используйте правильный тип: Стандартизировать использование типов 4, 5 или 6. многофакторные химические индикаторы внутри каждой упаковки, пакета и контейнера.
- Последовательное размещение: Индикатор всегда размещайте в самом труднодоступном месте упаковки. Обучите персонал избегать простого просовывания индикатора под верхний слой пленки.
- Перед использованием проверьте: Предоставьте медицинскому персоналу (например, хирургическим техникам, медсестрам, ассистентам стоматологов) право проверять внутренние помещения. химический индикатор паровой стерилизации в месте использования. Если цвет изменился не идеально, упаковку необходимо немедленно отбраковать.
- Документируйте всё: Ведите подробные журналы всех циклов стерилизации, включая результаты физического контроля, химических индикаторов и биологических анализов. В случае отзыва продукции эта документация будет единственным подтверждением соблюдения процесса.
- Выбирайте надежных производителей: Выбирайте высококачественные индикаторы от проверенных производителей. Такие компании, как... Тяньжунь Компания производит широкий ассортимент стерилизационной упаковки и индикаторных решений, разработанных для надежной работы в сложных медицинских условиях. Использование сертифицированных медицинских изделий гарантирует точную реакцию химического состава индикатора на параметры стерилизации.
- Внедрить программу обеспечения качества: Регулярно проводите аудит процессов стерилизации. Убедитесь, что персонал обучен не только работе с автоклавом, но и тонкостям интерпретации различных типов стерилизации. медицинские химические индикаторные полоски.
Заключение
Понимание того, как читать химический индикатор паровой стерилизации Правильность интерпретации — это не просто наблюдение за изменением цвета; это интерпретация критически важных диагностических данных, касающихся эффективности инфекционного контроля в вашем учреждении. Пройденный индикатор дает уверенность в достижении стерильности, а не пройденный индикатор является важной системой оповещения, защищающей пациентов от потенциально опасных патогенов.
Благодаря приоритету надлежащей загрузки, планового технического обслуживания и строгому использованию высококачественных показателей, таких как те, которые применяются в комплексных производственных линиях, например, ТяньжуньМедицинские учреждения могут поддерживать самые высокие стандарты стерилизации и безопасности пациентов.
Часто задаваемые вопросы (FAQ)
1. Если внешняя индикаторная лента меняет цвет, нужна ли мне по-прежнему внутренняя химическая индикаторная полоска?
Да, безусловно. Внешняя лента (индикатор типа 1) лишь подтверждает, что упаковка подвергалась воздействию тепла внутри автоклава. Она не доказывает, что пар успешно проник сквозь упаковочный материал и достиг находящихся внутри инструментов. Только внутренняя лента подтверждает это. медицинская химическая индикаторная полоска (Тип 4, 5 или 6) может подтвердить, что необходимые параметры стерилизации были соблюдены в месте размещения инструментов.
2. Индикаторная полоска изменила цвет, но биологический индикатор (споровый тест) для данной нагрузки не сработал. Безопасно ли использовать эти приборы?
Нет, инструменты следует считать нестерильными. Биологический индикатор является окончательным тестом на летальность. Если споры выжили, процесс стерилизации не удался, независимо от показаний химической полоски. Химические полоски доказывают, что условия были соблюдены в конкретном месте; тесты на споры доказывают, что микроорганизмы действительно были уничтожены. Необходимо отозвать партию, проверить автоклав и добиться положительных результатов тестов на споры, прежде чем снова использовать аппарат.
3. Индикатор концентрации химических реагентов в моей системе паровой стерилизации изменил цвет на бледный или сероватый, вместо сплошного черного. Что это значит?
Выцветший, сероватый или «блеклый» вид — классический признак плохого качества пара, особенно «влажного пара». Это происходит, когда в подаче пара слишком много влаги, что может препятствовать реакции химического красителя и часто приводит к намоканию упаковки. Поскольку не были соблюдены правильные параметры стерилизации (насыщенный пар), необходимо рассматривать это как неудачный цикл, отбраковать загрузку и вызвать специалиста для проверки системы генерации пара в автоклаве.